Modular Multimedia Exhibition Stands: Build Your Stand Like LEGO for Any Format
One Stand for Every Exhibition: Is It Possible?
It’s a familiar situation. This year, you exhibit in a 9 m² space. Next year, the organizers offer you 18 m² in a 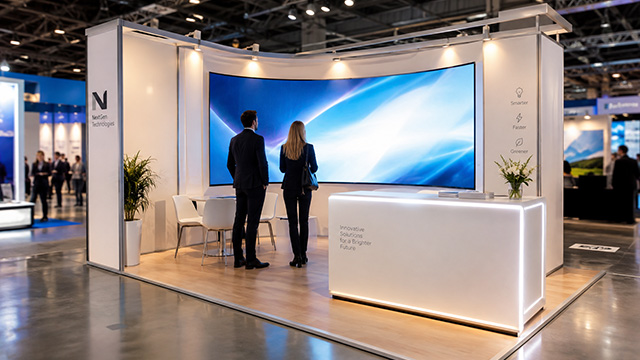 better location. A year later, you secure 36 m² and want an island stand. The traditional approach means starting from scratch every time: a new design, a new structure, and video content that must be reworked to fit different screen proportions. Costs rise, deadlines get tighter, and the stand you built for the previous show ends up in storage or gets scrapped.
A modular approach solves this problem much like LEGO bricks. Instead of buying a single stand, you invest in a system: a set of compatible components that can be assembled into anything from a compact 3×3 m display to a large 6×6 m island stand. The structural components remain the same, and there is no need to recreate the content from scratch.
In this article, we’ll explore how this works in practice.
The Three Layers of a Modular System
Modularity works best when it is built into three layers from the outset. If only the structure is mo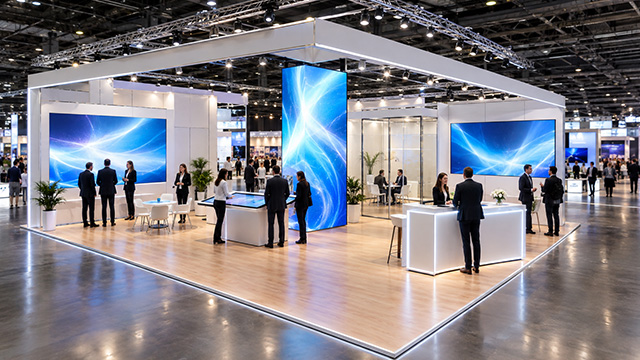 dular while the content is designed for one fixed format, you will still end up paying for content revisions.
1. Structure. Frames, panels, flooring, ceiling elements, and suspended components designed around a common modular grid.
2. Multimedia equipment. LED display cabinets, screens, video processors, audio systems, lighting, and interactive stations.
3. Content. Videos, animations, interfaces, and presentation sequences designed as a flexible system rather than a single video tailored to one screen.
Let’s look at each layer in detail.
Layer 1. Structure: One Consistent Modular Grid
The foundation of any modular system is the module and the grid. Every component follows a common base dimension, such as 1 m or 0.5 m. This allows different configurations to be assembled using the same set of parts.
Here is what a consistent grid delivers in practice: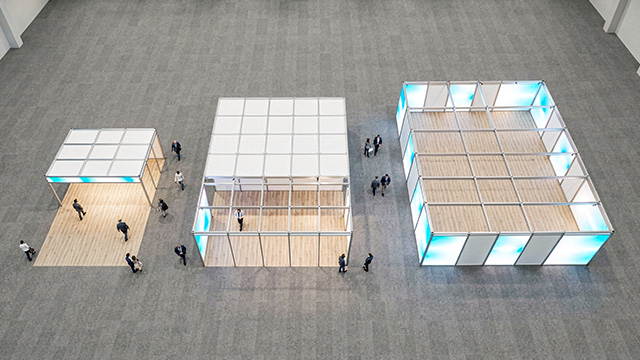
- Compatibility. A 1 × 2.5 m wall panel fits both a 3 × 3 m stand and a 6 × 6 m stand.
- Predictable installation. The crew follows a predefined assembly plan. There are fewer surprises on-site and fewer hours spent on installation.
- Simplified logistics. Components are packed in standardized transport cases and shipped using conventional transport.
- Easy replacement. A damaged component can be replaced without halting the assembly of the entire stand.
For multimedia exhibition stands, it is particularly important to engineer the structure to support equipment loads, including the weight of LED display cabinets, screen mounting systems, cable routing, ventilation, and maintenance access. Technical compartments and cable channels should be incorporated into the frame design from the beginning, rather than improvised on installation day.
Layer 2. Multimedia: Displays That Fit Together Like Building Blocks
The key building block of a multimedia exhibition stand is the LED display cabinet. It comes in a standard size, often 500 × 500 mm or 500 × 1,000 mm, and features quick-lock connections, with power and signal distributed through daisy-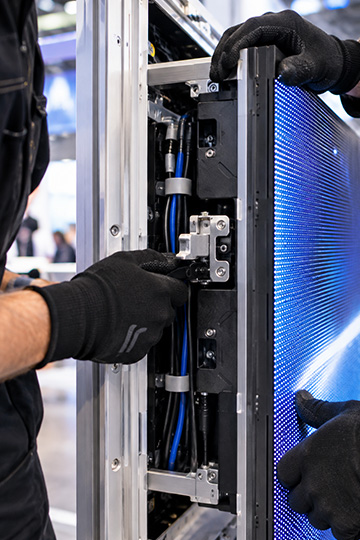 chained connections.
These cabinets can be combined to create displays in a variety of configurations:
- A single 3 × 2 m screen on the back wall of a compact stand.
- A wide 6 × 2.5 m video wall when the stand expands.
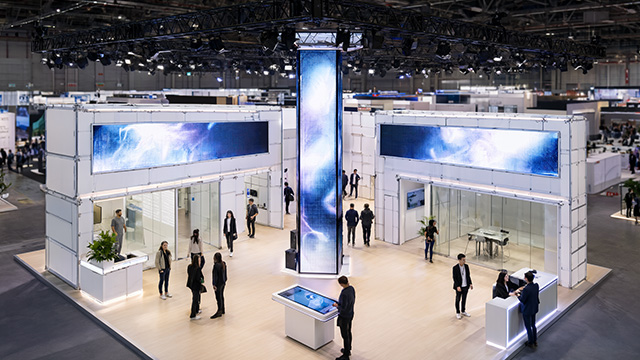
- Two angled screens or themed display columns for an island stand.
- Non-standard shapes, including arches, stepped displays, and vertical towers.
The video processor does the essential work of adapting the image to the current screen configuration. You change the display layout in the settings rather than ordering new equipment.
Other system components may include:
- Interactive panels and touchscreen tables that serve as standalone engagement stations.
- Built-in displays and screen openings integrated into the structure.
- Audio systems and directional speakers for zoning different areas.
- LED accent lighting and lighting sequences synchronized with the video content.
- A unified control system that lets you operate all devices from a single controller or tablet.
A good practice is to define the core system and optional extensions in advance. The core includes the elements present in every configuration, such as the main screen, reception desk, and interactive station. Extensions are added as the available floor space increases: side video walls, demonstration areas, and meeting pods.
Layer 3. Content: The Most Challenging Part—and the Biggest Opportunity
Content is often what undermines the entire concept of modularity. A video created for a 16:9 screen cannot simply be stretched across a 3:1 display without compromising its composition. That is why Omelchak designs content as a modular system, just like the stand itself.
Key Principles of Adaptive Content
- Layered composition. Backgrounds, key visuals, text, and graphics are created on separate layers. This makes it possible to recompose the layout for a different screen format without reanimating everything.
- Safe zones. The most important elements—such as the logo, product visuals, and key message—are positioned within a central area that remains visible across different configurations.
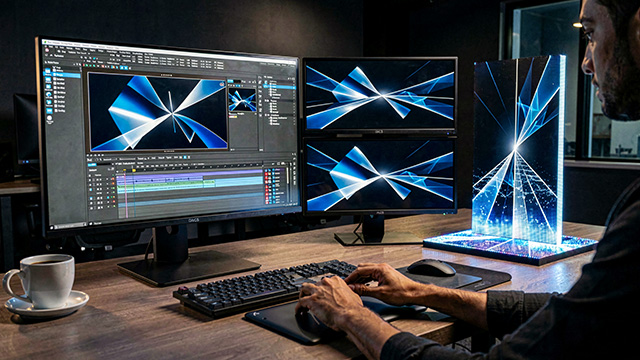
- Scalable backgrounds. Background graphics are designed with extra width and height, allowing them to adapt naturally to different aspect ratios.
- Modular scenes. The presentation is divided into independent content blocks. A smaller stand might use three blocks, while a larger configuration can display six, including additional storylines.
- A consistent visual identity. Colors, typography, editing rhythm, and animation techniques remain consistent across all formats.
- A master project and automated exports. A single master project is used to generate multiple versions tailored to different screen configurations.
As a result, when moving from a 3 × 3 m stand to a 6 × 6 m stand, you do not need to commission an entirely new video. You simply add the missing scenes and activate the layouts that have already been prepared.
How a 3 × 3 m Stand Becomes a 6 × 6 m Stand
Let’s illustrate the concept with a practical example. Here are several possible configurations built from the same modular system.
|
Configuration |
Floor Space |
Components |
|
Basic |
3 × 3 m (9 m²) |
Rear LED video wall, reception desk, one interactive station, illuminated logo |
|
Expanded |
3 × 6 m (18 m²) |
The same components, plus a side video wall, demonstration area, and an additional counter |
|
Corner / Peninsula |
4.5 × 6 m (27 m²) |
An additional angled video wall and a meeting area |
|
Island |
6 × 6 m (36 m²) |
A central video column or cube, open sides, two or three interactive zones, and a meeting pod |
What Stays the Same as the Stand Grows
- The core structural grid and mounting hardware.
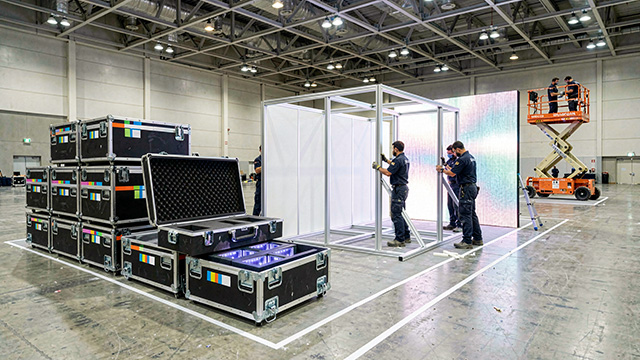
- The main LED display cabinets and video processor.
- The visual identity and master content project.
- Transport cases and installation procedures.
What Gets Added
- Additional wall and flooring modules.
- New screens and interactive stations.
- Expanded content sequences.
- Lighting and audio for the additional zones.
This approach turns stand expansion into a straightforward, predictable upgrade rather than a completely new project.
The Economics: Where You Save Money
A modular stand requires a more substantial initial investment, but it can pay for itself quickly through repeated use and reduced production costs.
- Reusable components. One system can be used across multiple exhibitions for many years.
- Lower content production costs. A master project and adaptive content structure reduce the amount of rework required.
- Faster installation. A predictable assembly process reduces on-site labor and the risk of costly overtime.
- Simplified logistics and storage. Standardized cases and clearly organized components reduce handling damage and make transportation easier.
- Budget flexibility. You can start with a basic configuration and purchase additional modules as your needs evolve.
The exact savings depend on the project, but the principle is straightforward: the more exhibitions and stand formats you plan for, the greater the potential value of a modular system.
Common Mistakes to Avoid
- A modular structure with one-off content. Any initial savings disappear when the video has to be reworked for every new configuration.
- No unified modular grid. Components almost fit together but still require on-site modifications.
- Technical requirements overlooked. Cable routing, power supply, and ventilation are left until the last minute.
- Incorrect viewing-distance assessment. The LED display pixel pitch must be selected according to the actual viewing distance.
- No plan for future expansion. Without designing two or three possible configurations from the outset, scaling up can still turn into a project built from scratch.
- Insufficient investment in control systems. Without centralized control, a complex stand can quickly become a tangle of remotes and disconnected devices.
Checklist Before You Place an Order
- What stand sizes and formats will you need over the next two to three years?
- Which components must be included in every configuration (the core system)?
- What viewing distances and visitor traffic volumes do you expect?
- Will you need interactive zones, meeting spaces, or demonstration areas?
- How often will the content change, and who will manage it?
- What logistical constraints do you need to consider, including countries, venues, transportation, and storage?
A modular multimedia exhibition stand is a solution that grows alongside your business. A unified structural grid, LED displays built from standardized cabinets, and adaptive content make it possible to scale from 3 × 3 m to 6 × 6 m without having to redesign everything from scratch.
Our team designs and produces multimedia content and builds exhibition stands as integrated systems—from the initial concept and creative direction to on-site installation. Tell us about your upcoming exhibitions, and we’ll propose a configuration designed to work not just for one event, but throughout the exhibition season and beyond.